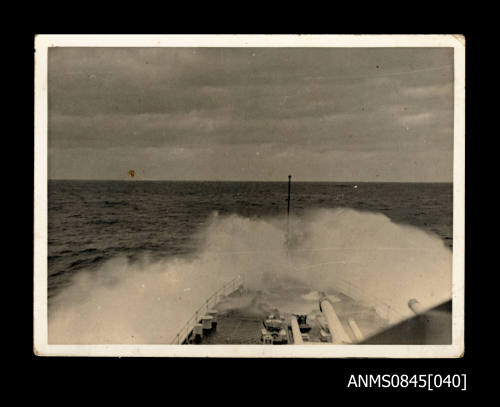
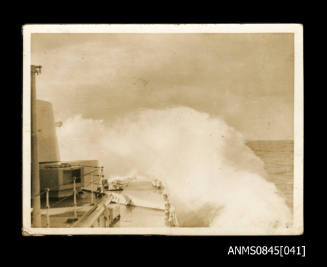
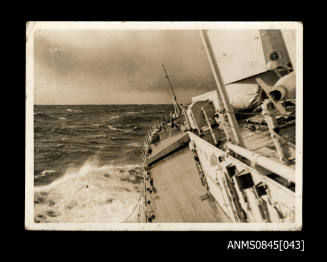
Spray from the bow of HMAS SYDNEY II
DateAugust 1939
Object numberANMS0845[040]
NamePhotograph
MediumSilver gelatin print on paper
DimensionsOverall: 83 × 109 mm
ClassificationsPhotographs
Credit LineANMM Collection Gift from J Buckton
DescriptionA black and white image of a spray coming over the bow of HMAS SYDNEY II at sea. Handwritten on the back of the photograph is an inscription reading 'Spray coming from Darwin, 1939'. HMAS SYDNEY II departed Darwin on 21 August 1939 to Bali where it arrived three days later. This was part of HMAS SYDNEY's Winter Cruise.
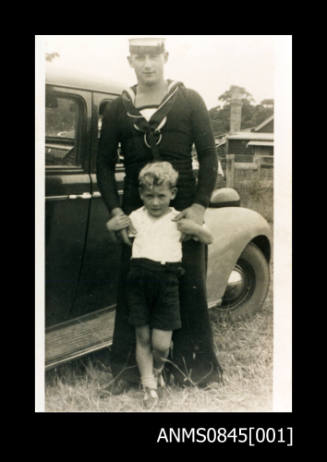
This image is part of a collection of photographs of Arthur Thomas Wood who served as an Able Seaman on HMAS SYDNEY II from 1938-1941. He was 20 years old when he was lost with the rest of the HMAS SYDNEY II crew on 19 November, 1941.HistoryAble Seaman Arthur 'Tom' Wood was born in 1921 in Berry, New South Wales. He was the eldest child of Arthur and Ruby Wood and joined the Royal Australian Navy in 1938 at the age of 17 1/2. Tom carried out his training at HMAS CEREBUS and then joined HMAS SYDNEY II in 1939.
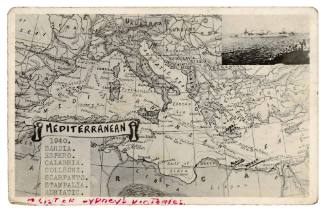
HMAS SYDNEY II was on tour when was declared in September 1939. It was ordered to serve in the Mediterranean Sea for escort duty. On 12 July 1940 HMAS SYDNEY II was in the battle that sank the Italian ship ESPERO then on 19 July 1940 SYDNEY sank the Italian cruiser BARTOLOMEO COLLEONI then returned to Australia when the Pacific War commenced. HMAS SYDNEY II was based in Fremantle, Western Australia, where Tom met and married Vickie Marsden. That same week HMAS SYDNEY II sailed on her last duty.
On 19 November 1941 HMAS SYDNEY II was returning from convoy duties in Java and proceeding south down the North West coast of Australia. What took place aboard the cruiser is a matter of conjecture, but it is likely that she sighted what appeared to be a harmless merchantman at about 1600 some 130 miles west of Shark Bay, Western Australia.
Feigning innocence and claiming to be the Dutch ship STRAAT MALAKKA, HSK KORMORAN by various subterfuges, avoided replying to HMAS SYDNEY's II repeated signals requesting identification. Finally, when concealment of her true identity was no longer possible, and the advantage of surprise, the raider opened fire with all armament at a range of 'somewhat more than a mile'.
It is now believed that the raider’s first salvo destroyed HMAS SYDNEY II's bridge, with the result that her primary control was immediately put out of action. HMAS SYDNEY II's own guns opened fire almost simultaneously, and hits were scored on HSK KORMERON's engine room, starting a fire which would eventually cause its abandonment and loss. Early in the action the raider succeeded in torpedoing HMAS SYDNEY II abreast the forward turrets, thus jamming their training. SYDNEY herself fired four torpedos at the raider from local control but scored no hits. It was later estimated that during the short, brutal battle HMAS SYDNEY II was hit at least 87 times by heavy shells from the German raider and with hundreds of lighter explosive bullets.
There were no survivors from HMAS SYDNEY II complement of 645. It is likely the Captain, officers and 70% of the crew were killed very early on in the encounter. The 318 survivors from HSK KORMORAN reported that HMAS SYDNEY II was last seen heavily on fire and down by the bows, as a burning glow on the horizon. The survivors of the HSK KORMORAN were interned in Australia until after the war.
In March 2008, a search organised by the Finding Sydney Foundation, in partnership with shipwreck investigator David Mearns, located the wrecks of HMAS SYDNEY II and HSK KORMORAN on the seabed in 20112 nautical miles from the West Australian coast, 12 miles from each other.
SignificanceThe loss of HMAS SYDNEY II is Australia’s greatest naval tragedy. Its disappearance in 1941 without a trace left a legacy of uncertainty for decades that was heightened by a media blackout in the following years of the disaster.
These photographs from the collection of Able Seaman 'Tom' Wood, put a distinctly human face to the months on board HMAS SYDNEY II leading up to 19 November 1941.
August 1939

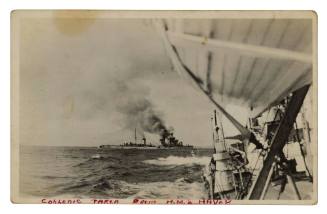
19 July 1940
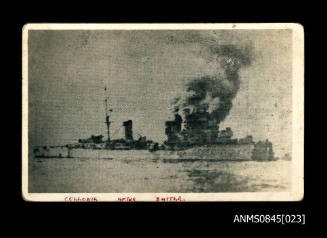
19 July 1940

Archive Series (item)/Archive Item (series)