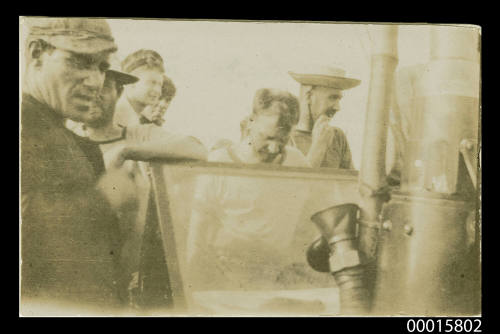
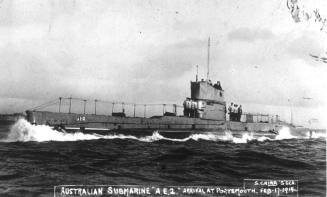
The crew of submarine AE2 on the bridge in the dog watch
Datec 1914
Object number00015802
NamePhotograph
MediumSilver gelatin print on paper
DimensionsOverall: 48 × 74 mm
ClassificationsPhotographs
Credit LineANMM Collection Gift from Jennifer Smyth
DescriptionThis photograph taken around 1914 depicts crew of AE2 on the bridge during the "dog watch".
The dog watch shift is between 16:00 and 20:00. A handwritten inscription on the reverse reads "on aeii's bridge in the/ dog watcher[watches?]/ note bamboo signal mast".
HistoryAfter an initial attempt by Lieutenant Brodie on April 17 in the submarine E15 failed, it was agreed that AE2 under Commander Henry Stoker would attempt to get through the Dardenelle Straits and into the Sea of Marmara. It was hoped that dominance here would stop or severely hamper Turkish troop and supply movements to the Peninsular and Gallipoli and also allow the Allies a supply route direct to Russia.
On April 25, AE2 started her second attempt at the Dardenelles Strait. On that first day she successfully negotiated the minefields, shelling from forts on the shore and pursuit by enemy ships who had detected her whilst she surfaced. Having made this initial progress, 26 April saw her relatively undeterred although the enemy was still searching for her and she did suffer an attack by anti-submarine vessels. Over the next two days AE2 managed to avoid the ships hunting her from above but had also narrowly missed her own torpedoed targets. On the 29 April, now in the Sea of Marmora, she encountered HMS E14 who had also successfully passed through the Dardanelles behind her.
On the morning of April 30 however, AE2 unavoidably surfaced too close to a Turkish torpedo boat, SULTANHISAR. She was immediately spotted and was opened fire on. During what must have been a desperate half hour, AE2 could not stabilize and after the engine room was hit and holed in three places, Commander Stoker focused on saving the crew and ensuring AE2 did not fall into enemy hands. He ordered all men on deck and assisted by Lieutenant Haggard, the Commander opened all tanks and the submarine was flooded and sunk six kilometres north of Kara Burnu.
All members of the AE2 crew survived that final encounter and the scuttling of their vessel. They were subsequently imprisoned in a Turkish prisoner of war camp for the next 3 1/2 years where four crew members lost their lives through illness.SignificanceThe story of the AE2 and her infiltration of the Dardanelles in World War I is a significant Allied military and Australian naval episode. Although the event did not ultimately alter the course of the war it did demonstrate to Britain that Turkish waters could be breached. Subsequent submarine activity there by E11 and E14 did hamper Turkish efforts to supply their troops engaged at Gallipoli by forcing supplies and reinforcements to go overland.The success of AE2 in making it through the Dardenelles was news that was relayed to troops at Gallipoli and was mentioned by General Hamilton in his directive to Lieutenant-General Birdwood that Allied troops would remain at Gallipoli (Hamilton, quoted by Rhodes James, Gallipoli, London, 1999, p.130).

